Showing posts with label Linux Admin. Show all posts

Wednesday, May 18, 2011

To view current Exim queue details using Perl script

To get the detailed results of Exim mail queue using a simple perl script.


____________________________________________________________________________________

root@sysadmin [~]# ./exim_queue_report.pl


                   EXIM MAIL QUEUE REPORT                  

============================================================


-> Total mails in Queue: 3

-> No of frozen emails : 2


-> Emails per CPanel User:


 COUNT   USER

----------------------------------

    2   mailnull

    1   marcm


-> Mails to following email addresses got bounced:


 COUNT   EMAIL

----------------------------------

    1   helensss@123new.com

    1   jerry1@nopytruction.com


-> Subject of emails in the mail queue:


 COUNT   SUBJECT

----------------------------------

    5   Mail delivery failed: returning message to sender

   12   Seminar topics


-> From address of mails in the mail queue:


 COUNT   FROM

----------------------------------

    2   Mailer-Daemon@server1.tchmachines.com

    1   jblac@aol.com


============================================================


-> What do you want to do?


 [1] Remove all mails of a Cpanel user

 [2] Remove all mails with specific subject

 [3] Remove all mails originated from a script source

 [4] Remove all bounced emails

 [5] Remove all frozen emails

 [6] Remove all mails From: specific email address

 [7] Chmod a script source to 000

 [8] I'm done! Exit..


Your choice ( 1 to 8 ) >;

________________________________________________________________________________


You can download the above script Download Exim Queue Report

[technomance]


Tags:-Exim mail queue,cpanel, exim mail queue scripts


Saturday, October 2, 2010

Cpanel Help- How to extract a zip archive via Cpanel?

You can upload a zip file to cPanel using the cPanel option "File Manager", the below steps explains you, how quicker and efficient the option is


Step1. Login to cpanel, click on file manager option


Step 2. Browse the location, where you want to upload your zip file


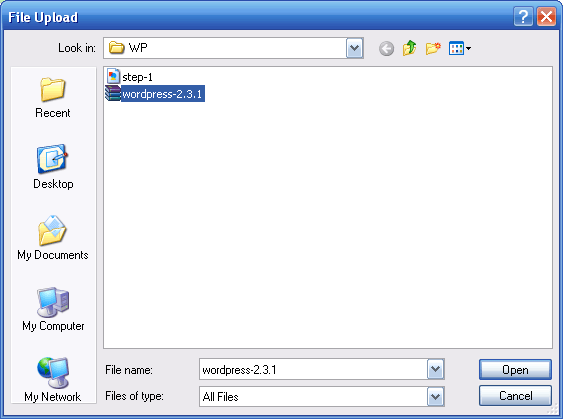
Step 3. By clicking the browse button, upload the zip file .


Step 4. Select the upload file and click on "extract icon" on the top of the page


[After you have clicked on "extract" a box will pop up asking you to choose the location. The default location is the directory that you are currently in. You can change this if you wish.]


Now the selected zip file is completely extracted to the location you have selected.


Tags:-cpanel,control panel,Linux control panel,linux webhosting help,cpanel help

Tuesday, September 21, 2010

Wordpress for BlackBerry version1.3-


Depending on your region or country, you might not see the latest version in the BlackBerry App World, but on your device you should now already see the latest version 1.3.


These features have been added in version 1.3:


    * Option to load more comments, not just the latest 100

    * Ability to load comments by status (all/spam/pendings)

    * You can now edit the comment details (Author Name/E-mail/URL)

    * Option to manually set the video-size when using VideoPress service

    * A much requested formatting toolbar that allows you to bold text for example

    * A new word count feature is shown on the post/page write screen

    * You can now submit bug reports and feedback from within the app

    * Multiple improvement to how Stats are handled

    * Improvements on the photo resizing options and a new jpeg encoder is now being used


For more information click on the link - Wordpress for BlackBerry version1.3


Use Postie plug-in for Post blog using black berry phone as email


To download Postie,click on the link - Download Posties Plugin


Tags:-wordpress,blackberry,wordpress help, wordpress 

How to upgrade Wordpress Manually


Step 1. Go to the " Download latest version of wordpress"  page in google


Step 2. Copy the link address


Step 3. Wget link [ From the server and also in the folder where wordpress installed ]


step 4. unzip Download file


step 5. remove or rename wp-admin and wp-includes [currently installed ]


Step 6. GO to download folder and remove wp-content [from the file,above we download ]


step 7. copy the files in the download download folder to the wordpress installation folder

         { # cp -pr * ../- command used to copy to the parent dir }


Steo 8 change ownership of files and folders


step 9 go to www.domainname.com/wp-admin/upgrade.php

       {for upgrading database }


[ Refer to the url for more information - http://codex.wordpress.org/Updating_WordPress ]


Tags:-Linux server Admin Help,cPanel,wordpress,wordpress manual installation 

Monday, July 12, 2010

Steps for changing WHM to secure your Server


For more information and tutorial,visit this url ==>>http://docs.cpanel.net/twiki/bin/view/AllDocumentation/WHMDocs/WebHome

Goto Main ==>> ServerConfiguration =>> Tweak Settings in WHM

To make secure,change the settings as
1. Number (or all) of accounts to display per page in list accounts = 30
2. Disable : Allow users to park subdomains of the server’s hostname main domain
3. Disable : Allow users to Park/Addon Domains on top of domains owned by other users.
4. Disable : Allow users to Park/Addon Domains on top of domains owned by other users.
5. Disable : Allow resellers to create accounts with subdomains of the server’s hostname main domain
6. Disable : Allow Creation of Parked/Addon Domains that are not registered
7. Disable : When adding a new domain, automatically create A entries for the registered nameservers if they would be contained in the zone
8. Enable : Prevent users from parking/adding on common internet domain
9. Enable : Silently Discard all FormMail-clone requests with a bcc: header in the subject line
10. Fail: Default catch-all/default address behavior for new accounts. "fail" is usually the best choice if you are getting mail attacks.
11. disable:Track the origin of messages sent though the mail server by adding the X-Source headers (exim 4.34+ required)
12. The maximum each domain(mail limits) can send out per hour (0 is unlimited)-200 or 300
13. Disable: Prevent the user "nobody" from sending out mail to remote addresses (PHP and CGI scripts generally run as nobody if you are not using PHPSuexec and Suexec respectively.)Disable should enabled on server with phpsuexec.
14. Disable: Include a list of Pop before SMTP senders in the X-PopBeforeSMTP header when relaying mail. (exim 4.34-30+ required)
15. BoxTrapper Spam Trap
16. Disable : Add the mail. prefix for mailman urls
17. Enable:Horde Webmail
18: Enable: Mailman
19. RoundCube Webmail
20. SpamAssassin Spam Filter
21. SpamAssassin Spam Box delivery for messages marked as spam (user configurable)
22. SquirrelMail Webmail
23. Disable:Send passwords in plaintext over email when creating a new account
24. Disable:Awstats Reverse Dns Resolution
25. Disable:Analog
26. Disable:Allow users to update Awstats from cPanel
27. Enable: Notify the admin, (or the reseller), when an account has reached the "critical" Disk Usage state
28. Threshold percentage where a user's disk usage is considered to be in the "critical" state. (0 will disable this notification)-90
29. Number of days between processing log files and bandwidth usage = 1
30. Enable : Delete each domain’s access logs after stats run
31. The load average above the number of cpus at which logs file processing should be suspended = 10
32. Enable : Keep Stats Log between cPanel restarts
33. Disable : Allow Perl updates from RPM based linux vendors
34. Enable : Use jailshell as the default shell for all new accounts and modified accounts
35. Disable : Allow cPanel users to reset their password via email
36. Enable : Spamassasssin
37.Enable PHP open_basedir Protection. Tweak Security
38. Enable mod_userdir Protection.
39. Enable SMTP Tweak
40. Disable Compilers for unprivileged users.

Tags:-whm,whm configure,whm settings,whm to secure serve,server secre using whm,whm configuration,whm settings

Steps to disable website pages download using wget ?


Wget is a network utility to retrieve files from the World Wide Web using HTTP and FTP.It works non-interactively, so it can work in the background, after having logged off. The program supports recursive retrieval of web-authoring pages as well as FTP sites—you can use Wget to make mirrors of archives and home pages or to travel the Web like a WWW robot, checking for broken links.

For disabling wget to grab your site pages then simply add the code below in the .htaccess file under public_html directory [for which you wish to disable the wget grabbing].

===================================
SetEnvIfNoCase User-Agent “^Wget” bad_bot

Order Allow,Deny
Allow from all
Deny from env=bad_bot

===================================

Now, if anybody tries to grab info from your website using wget, he will receive a 403 error.

Please check this link to know more information about wget

http://wget.addictivecode.org/FrequentlyAskedQuestions

Tags:-wget,cpanel,webadmin,serveradmin,apachae,linux,commands,wget,cpanel,whm

Tuesday, July 6, 2010

Steps to disable Telnet in a Server


Telnet is a network protocol used as "bidirectional interactive text-oriented communications" underlying TCP/IP protocol for accessing remote computers.Telnet is unencrypted and sends clear text passwords and usernames through logins and should be disabled on all web servers and replaced with SSH.Some hosting providers are not disabling telnet by default but you should ensure that it has been turned off as it's a great security risk to your servers. TELNET server listens for incoming messages on port 23, and sends outgoing messages to port 23.

1. Login to your server through SSH and su to root.

2. Type pico /etc/xinetd.d/telnet

3. Look for the line: disable = no and replace with disable = yes

4. Now restart the inetd service: /etc/rc.d/init.d/xinetd restart

5. Turn off it through chkconfig as well because it can still start through that.
/sbin/chkconfig telnet off

6. Scan your server to ensure port 23 is closed.
nmap -sT -O localhost

Also run ps -aux | grep telnet and if you find anything other than "grep telnet" as result kill the process.

Tags:-Linux,telnet,disable telnet,differnece between telnet and ssh,ssh,telnet command,defenition,define telnet,ports